Use fresh, filtered water.
Coffee is 98 percent water. If your tap does not taste good on its own, it will not taste good in your coffee. See the Water section above for the Singapore-specific reality.
Choose your brew
Tap a method to jump to its recipe. Filter ratios sit around 1:15. Tweak to taste.
First principles
Coffee is 98 percent water. If your tap does not taste good on its own, it will not taste good in your coffee. See the Water section above for the Singapore-specific reality.
Pre-ground coffee loses freshness rapidly. Even an affordable hand grinder makes a noticeable difference. The grind is the single biggest variable you control.
A simple kitchen scale accurate to 0.1 g takes the guesswork out of consistency. The difference between 14 g and 18 g is a completely different cup.
Fresh-roasted coffee needs time to degas. For filter, start tasting at 1 week. For espresso, wait at least 2 weeks. Peak flavour for most WASA coffees is 2.5 to 4 weeks after roast.
90 to 95°C for filter brewers (V60, AeroPress at light roast). Moka pot and french press are deliberate exceptions, see their recipe notes for why.
Change grind, OR temperature, OR pour rate. Never two at once. You will never know what fixed the cup if you change everything together.
Reference: James Hoffmann, V60 Pour Over Technique.
The conventional V60: a bloom and two pours with a pause in the middle, no swirl unless the bloom missed a dry spot. Reliable across most coffees and roast levels at the 1:15.5 ratio.
Use this when you want a predictable cup with no fuss. The unconventional two-bloom recipe below is the one I lean on for lighter roasts when I want to push extraction further.
Try this with these coffees .
Reference: Lance Hedrick, My Most Reliable V60 Method, April 2026.
This is the April 2026 baseline, designed to be reliable across any coffee at any roast level. Two mandatory blooms release CO2 before the main pour, so the bed does not channel. The fast centre-circle main pour agitates deliberately, no swirl needed. Swirling slows the flow and is only used at the end if the drawdown is moving too fast.
Ratio is 1:15. Ratio is your taste lever: 1:13 for stronger and more acidic, 1:16 to 1:17 for lighter. Grind is the lever to land your drawdown in the 2:00 to 2:30 window. There is no fixed grind reference because every grinder is different.
Temperature: 93°C is the default. 96 for ultra-light competition coffees, 90 to 92 for medium-light, below 90 for darker roasts.
Try this with these coffees .
Reference: Lance Hedrick, A Different AeroPress Recipe.
Lance's inverted recipe with a high coffee dose, a short steep, and a slow press, then dilution to drinking strength. The high dose and short contact time pull cleanly without over-extraction. Diluting after the press lets the cup keep its body while opening up the aromatics.
Grind around 1000 micron (medium-coarse). For darker roasts you can use 30 g coffee, 80°C water, grind closer to 1200 micron, same procedure.
Try this with these coffees .
Reference: Lance Hedrick, Switch Gong Fu, July 2025 (tweaked slightly).
Two innovations make this Switch recipe stand out. The cool Samo bloom (75°C) preserves aromatic volatiles that boil off with full-temperature blooms. Pouring every stream over a spoon (Melodrip-style) keeps fines in place so the bed stays uniform across the three immersion-percolation cycles.
Gentle surface stirring with a spoon between pours, not whole-cup swirls. The cup is more layered than V60, with both body and clarity.
Try this with these coffees .
Reference: James Hoffmann, Ultimate French Press (tweaked to 95°C for less bitterness).
Two classic french press faults: over-extraction and gritty body. Skimming the foam at 4 minutes removes the bitter fines that float up. The shallow plunge at 9:30 avoids forcing the sediment back through the bed. The cup is fuller-bodied than V60 but cleaner than a typical press.
Hoffmann's original calls for water just off the boil. I drop it to 95°C for a sweeter, less aggressive cup that respects the long steep.
Try this with these coffees .
Reference: James Hoffmann, Ultimate Moka Pot Technique (tweaked slightly).
Pre-boiled water and low heat is the trick. It cuts the time the grounds sit on the burner, so the cup is sweet rather than scorched. The optional paper filter on top of the grounds catches oils and fines, giving you something close to filter clarity.
Try this with these coffees .
Reference: Lance Hedrick, Ultimate Flash Brew (tweaked slightly).
Brewing onto ice fixes aromatic volatiles instantly. The 1:15 effective ratio compensates for ice dilution, so the cup arrives at filter strength rather than weak. This is the one method where I still swirl, between the second and third pour, gentle, to settle the bed onto the ice.
Try this with these coffees .
Reference: Hybrid flash chill (community standard), tweaked slightly.
This is the only published recipe that genuinely uses the Switch valve mid-brew for iced. Open valve for the percolation phase, closed for the immersion phase, then drain. Higher hot dose plus reduced water mass compensates for ice dilution. The cup has surprising body for an iced brew.
Try this with these coffees .
Reference: James Hoffmann, dial-in framework (tweaked slightly).
This is the standard pump espresso starting point. Adjust grind first for time, then dose, then ratio. For light-roasted specialty beans push temp to 94 to 95°C and lean toward 1:2.5 to 1:3 over 32 to 35 seconds, the cup will be brighter and cleaner. Rest beans at least 2 weeks after roast before dialling in. Fresh beans channel.
Try this with these coffees .
Reference: Lance Hedrick, SOUP method (tweaked slightly to 96°C).
SOUP is Lance Hedrick's low-pressure technique for ultra-light roasts that taste sour or astringent under conventional 9-bar espresso. Medium to medium-fine grind, gentle 1 bar soak until the puck saturates, then a fast 6 ml per second press. The cup is closer to a concentrated filter brew, all sweetness and clarity, no bitterness.
Equipment: Cafelat Robot, Flair 58, Picopresso, OXO Rapid Brewer, or AeroPress with JOEPRESSO. Standard 9-bar pump machines cannot run this profile. Lance's original recipe uses near-boiling water, I dial it down to 96°C for a touch more clarity.
Try this with these coffees .
Specialty community standard, 1:8 immersion.
Cold brew brings out chocolate, caramel and nutty notes while reducing perceived acidity. Naturals and honey-process coffees make particularly good cold brews with berry character.
Try this with these coffees .
If something tastes off
On water
If your tap does not taste good on its own, it will not taste good in your coffee. Here is the Singapore-specific reality and what I actually use.
Singapore tap reality
Singapore PUB tap water carries roughly 75 mg per litre of bicarbonate, plus chloramine for disinfection. The chloramine does not off-gas like chlorine, so a Brita pitcher does not fully remove it.
The bicarbonate buffers acidity, which mutes brightness in light roasts. You can still make great coffee with tap, you just need to fight your water harder.
What I use at WASA
What I actually use at WASA: distilled water plus minerals. The Third Wave Water sachet is the simple route, one sachet stirred into 4 litres of distilled. The Light Roast Profile packet is calibrated for filter brewing of light single origins, which is most of what I roast.
The result is a clean, predictable mineral profile that lets the bean character come through without buffer-muting. No chlorine, no chloramine, no surprises.
Bottled water
If buying bottled, look for Total Dissolved Solids on the label. 100 to 200 ppm is the working window. Below 50 ppm is too soft and will flatten the cup. Above 250 ppm over-buffers acidity and mutes brightness.
Evian is too hard at around 300 ppm. Smartwater is closer at around 150 ppm. Distilled plus a mineral packet still beats both, because you control the profile exactly.
Origin journals
Where each bean came from, who farmed it, and how it ended up in your cup. One short story per single origin.
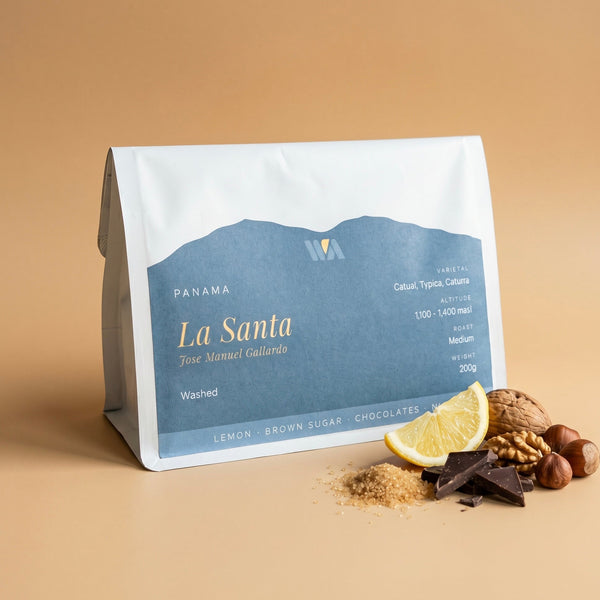
CHIRIQUI, PANAMA Panama La Santa: Cold Winds, Bright Cups By Leonard / April 2026 Some coffees earn a permanent spot on a roster. Pana...
Read the story
WEST VALLEY / COSTA RICA Costa Rica Azul: Red Honey from La Carreta Azul By Leonard / April 2026 The West Valley doesn't get the same ...
Read the story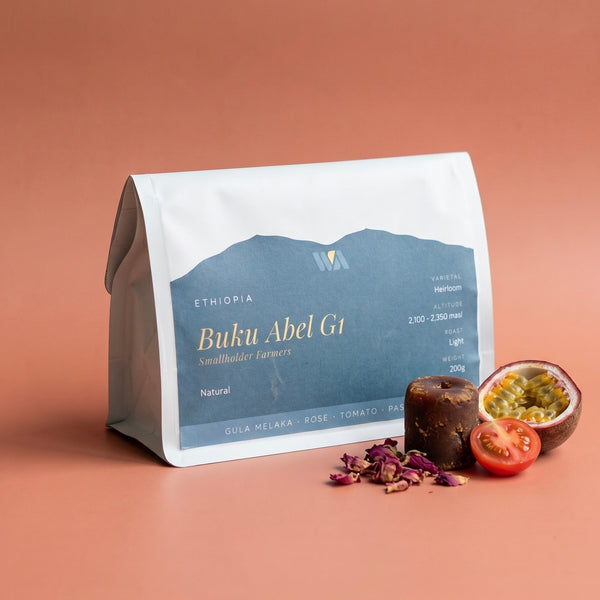
HAMBELA WAMENA / ETHIOPIA Ethiopia Buku Abel: Tomatoes, Rose, and a Cup That Resists Easy Categories By Leonard / April 2026 Some coff...
Read the story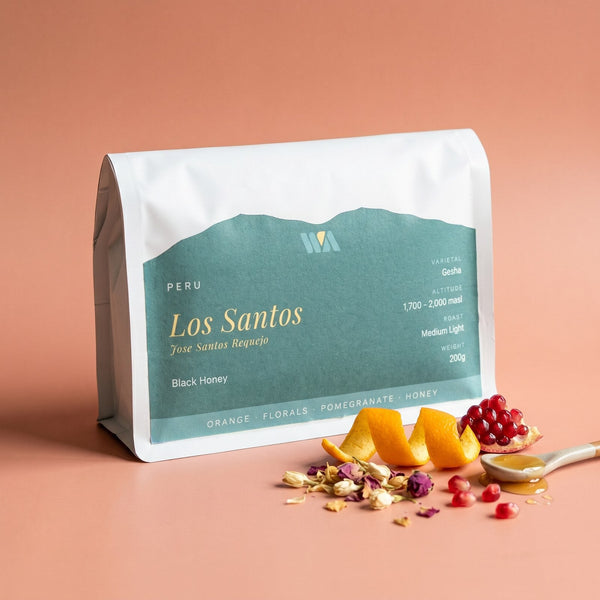
AMAZONAS, PERU Peru Los Santos Gesha: Black Honey from the Ayuyus Mountains By Leonard / April 2026 Amazonas sits in Peru's far north,...
Read the story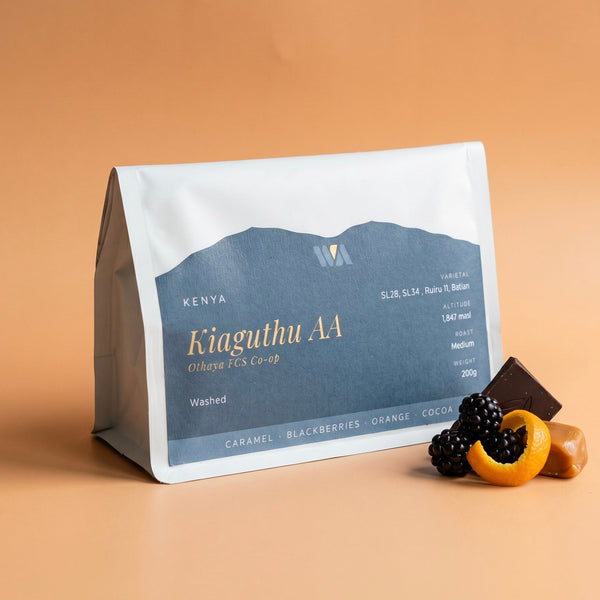
NYERI COUNTY, KENYA Kenya Kiaguthu AA: A Washed Coffee That Drinks Like a Natural By Leonard / April 2026 Kenyan AA from Nyeri is supp...
Read the story
COLOMBIA / HUILA Colombia Quebraditas Yeast Maceration A Sidra lot from Oporapa, processed through passionfruit yeast maceration, where...
Read the story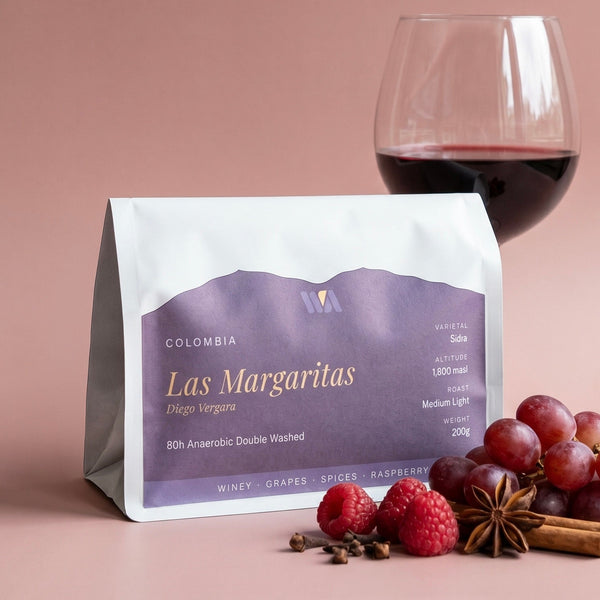
BRUSELAS, HUILA, COLOMBIA Colombia Las Margaritas Washed: Sidra at 1,800 Metres By Leonard / April 2026 Some coffees announce themselv...
Read the story